Over time you may accumulate unwanted or unused channels on your Roku streaming device. Too many extra channels cluttering up your Roku home screen making it frustrating to find your go-to apps. So let’s discuss how to easily delete Roku channels to clean up your account.
In this step-by-step guide you’ll learn:
– What deleting a channel actually does
– How to delete Roku channels from your account and device
– How to uninstall multiple Roku channels at once
– Tips for managing add/delete channel limits
Read on for simple instructions tailored for all Roku streaming media player models.
What Deleting a Roku Channel Really Does
Before jumping straight to uninstalling, let’s briefly clarify what deleting a Roku channel entails under the hood.
When you choose to delete a channel, two key things happen simultaneously:
1. The channel icon disappears from your Roku home screen menus. This removes its visibility and frees up space on your grids.
2. The channel’s account login gets signed out. By erasing its credentials and cache data, you ensure no further usage tracking.
However, note that deleting a channel won’t automatically cancel any paid subscriptions associated with that app. You’ll need to separately manage recurring billing through the channel provider itself.
Step-by-Step Guide to Deleting Channels on Roku
Without further ado, here is the full walkthrough for removing channels on any Roku streaming media player:
1. From your Roku home screen, navigate to the Settings menu. Select Settings or the gear icon.
2. Next choose Manage account > Channel store.
3. On Channel store page, select My channels from left side column.
4. You’ll now see managerial list view of all channels installed under your Roku account.
5. Browse alphabetically or use Search function to select the channel you wish to delete.
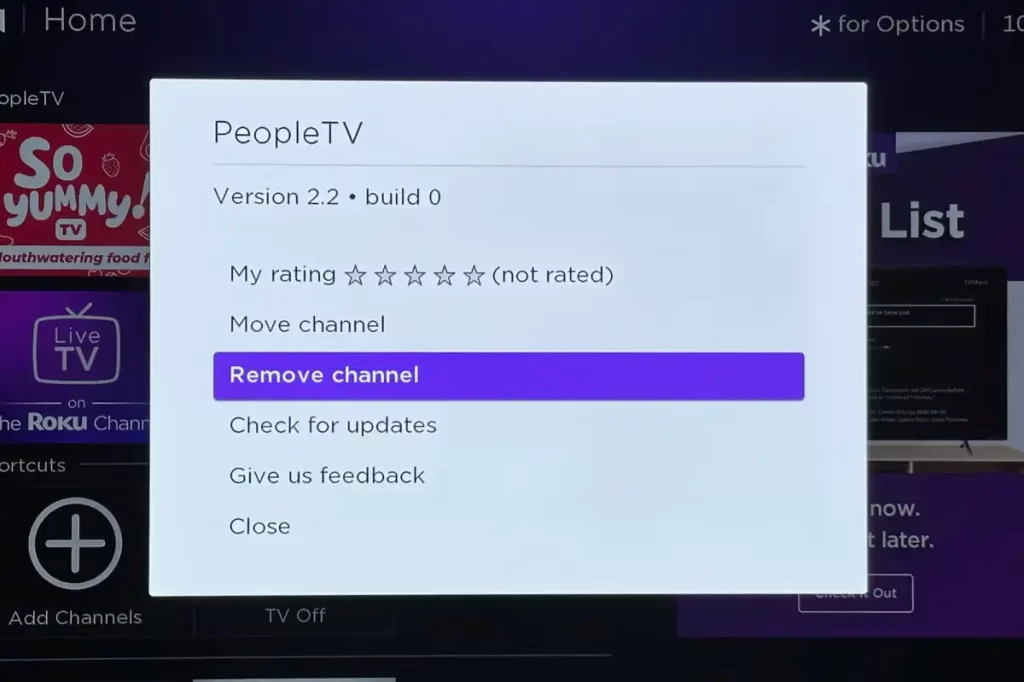
6. Choose Remove channel. A confirmation prompt will appear.
7. Select Yes, remove to authorize deleting the channel from your Roku.
8. Repeat steps 5-7 to continue removing additional channels as desired.
9. When finished with channel deletion process, press Home button to exit.
And you’re all set! The selected channels will vanish from your Roku interface for good.
Batch Removing Multiple Roku Channels
If you need to delete several channels at once, fortunately the Roku Channel store menu supports multi-select for quick bulk uninstalling:
1. Follow steps 1-4 above to access Channel list manager.
2. Click selection boxes next to channels slated for deletion.
3. Scroll down and click Remove at very bottom once all unneeded channels are checked off.
4. Confirm mass removal when prompted.
Using this handy batch method lets you rapidly clean up dozens of unwanted channels off your Roku in one swift sweep instead of spending ages removing one by one.
Reaching Roku Channel Delete Limit
One catch to note is that Roku enforces channel add/delete limits to curb suspicious churn activity. There’s no fixed ceiling, but try removing too many too fast and Roku may block additional deletes temporarily.
If you encounter channel deletion limits, simply wait an hour or two before trying again. This safety mechanism is designed to allow legitimate users add/delete flexibility while preventing shady freemium channel spamming/churning. As long as you prune channels responsibly at reasonable volumes, you shouldn’t run into problems.
In Summary
While keeping only your favorite streaming channels on Roku makes for easier navigation, too much uninstalling can risk hitting removal caps. Find the right balance through responsible channel management. And refer back to this guide anytime channels accumulate that don’t quite spark joy!